One thing i would like to add to this awesome write up since i think i found the error so would like to help you out.
Regarding thermostat for VX. You mentioned you're using 170F one. That's a incorrect theremostat. Correct one is 180F.
VX needs higher engine temerature then other trims to achieve better fuel economy. I believe you can get better mpgs with 180F one.
BTW there is also 192F one. Theory goes that higher temps leads to better fuel economy. Not sure if 192F is adviced tho. Honda techs know better. Here is nice write up on this subject too.
VX engine D15Z1 uses 180F
Other trims CX,DX,LX use 172F
Here is directely from 1992 Honda Civic VX SERVICE MANUAL

Statistics: Posted by Rango — Mon Apr 11, 2022 8:40 pm
]]>
Keyless Entry w/OEM Actuators
Putting an alarm on a Honda is mandatory. Without one it's just a matter of time before someone steals it. The major benefit then is to add keyless entry and a trunk popper. I've gotten so used to this that having a car without it feels painfully awkward. Even worse is having an alarm without keyless, because then you're constantly setting the alarm off when you unlock the doors manually and forget to first disarm the alarm.
Keyless entry is for cars that came with power door locks. If you don't have an LX, EX or Si, you need to add actuators. Traditionally you'd add universal aftermarket actuators. The problem is that they don't come out very clean. They're designed to work on old American cars, so they're way overpowered and loud. They often require cutting of the sheet metal, plastic door panel, and adding a metal strap.
On my own cars I'll only use OEM actuators. You don't need any of the factory wiring, relays or switches. The alarm has the relays built in or you can use a 451M (or two relays). OEM relays are the same between hatches, coupes and sedans, and screw right into your existing door latches. There are three little screws. Be careful not to strip them out.
What actuators can I use?
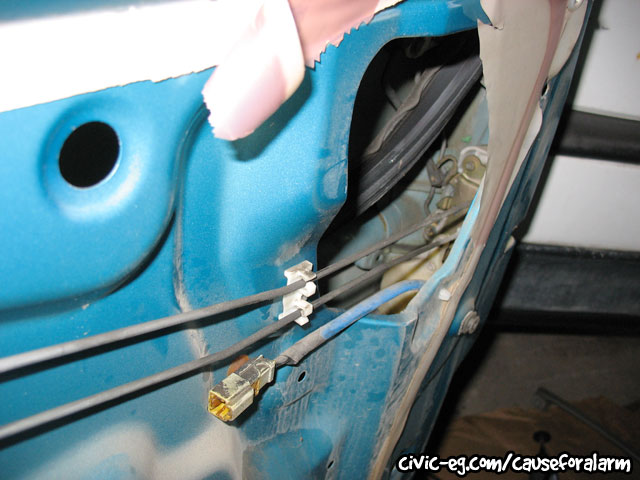
There's three types of actuators: the driver's door, the driver's side rear (sedan), and the passenger side (front and back are the same). The driver's front has three wires and the others have two. The three wires aren't an issue but you could use a sedan rear driver's side actuator if you want. You wire them up just like aftermarket actuators. The most difficult part is running the wires into the door (and it's a huge PITA).
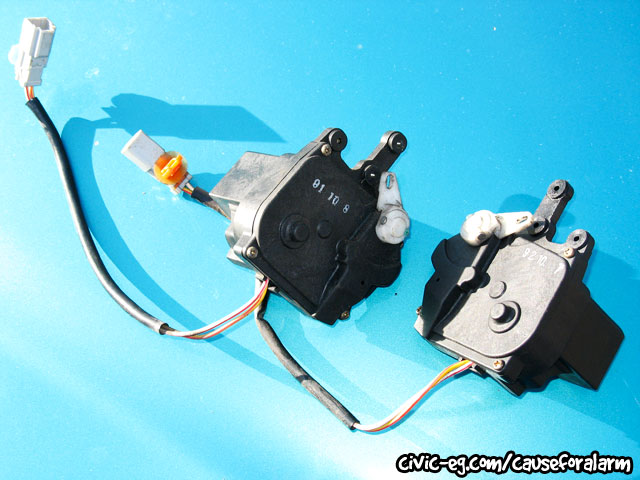
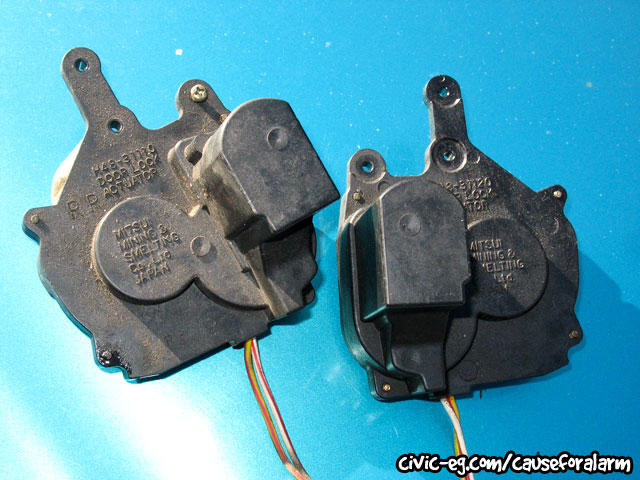
These pics are of black actuators but the ones I put in my car are white. They're the same; I just didn't take pics of the white ones before I installed them.
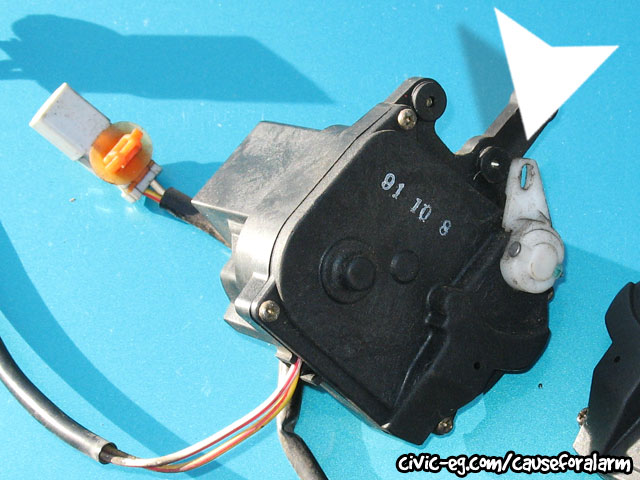
When you install the actuator to the latch, line up the little arm and insert the metal bar.
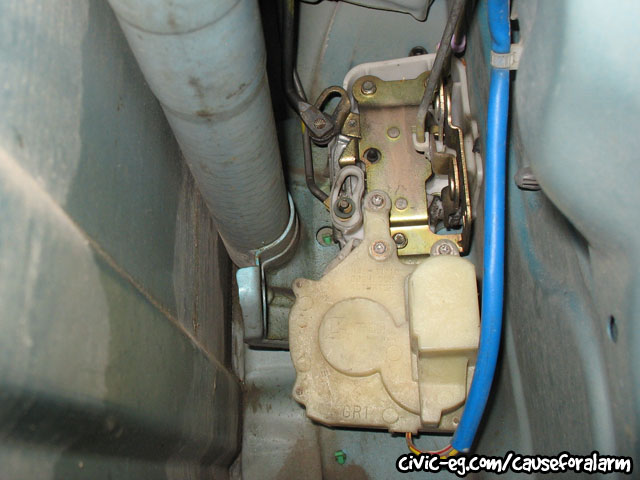
Trunk Actuator
For the trunk actuator you'll have to use an aftermarket universal actuator. Absolutely DO NOT use a "Trunk Actuator". These are huge, expensive, very difficult to install, and extremely overpowered. Use a universal door actuator. People keep telling me this can't work but I've been doing it on all kinds of cars for over a decade. In some cases you need to add a spring to pull the actuator back if the key mechanism doesn't do it naturally. The key to longevity is to use thread locker on the pinch bolts.
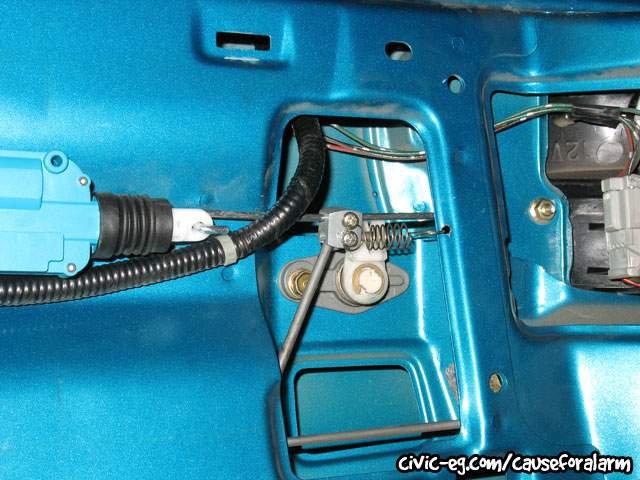
Mounting/Wiring
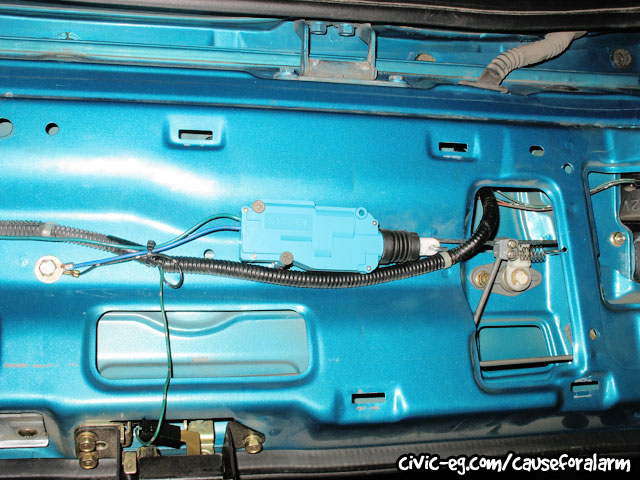
Mounting it can be very tricky on some cars. On hatchbacks there is very little room beneath the plastic cover on the hatch. You'll need a small, flat shaped actuator (DEI 524N). Some designs are too big. You'll need to choose the location carefully. It has to fit under the cover, but the action needs to be parallel to the action of the factory lock bar (Observe the movement by turning the key in the key cylinder. Ignore the shape of the bar itself). And then you'll have to trim the plastic ribs on the underside of the cover and check if it is pushing up on it after it's snapped down.
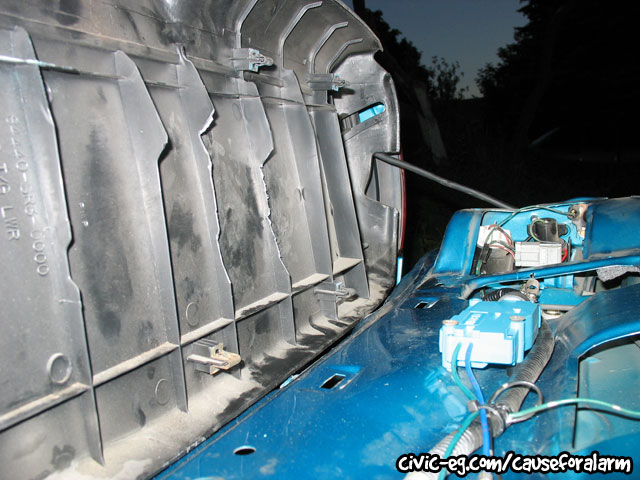
On coupes and sedans, there's generally more flexibility in mounting but you'll have to be very careful that your screws don't pierce the outer shell of the trunk lid. In all cases, running the wires to the hatch or trunk lid can be difficult if you're trying to fit it inside the OEM waterproof rubber boots. Ziptie-ing the wires to the outside of the boot is a good compromise. Wiring it up requires a relay.
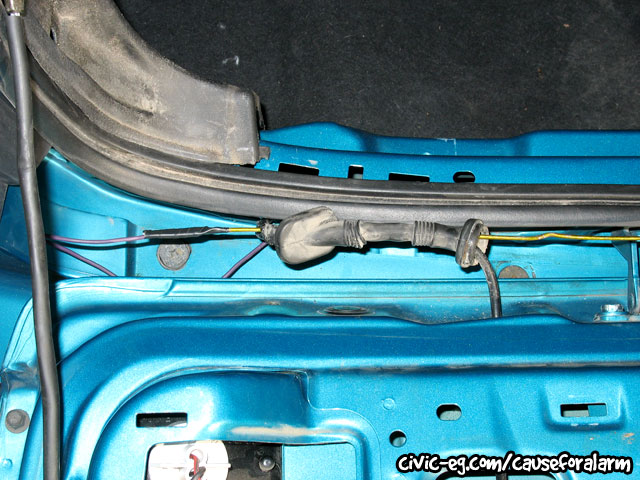
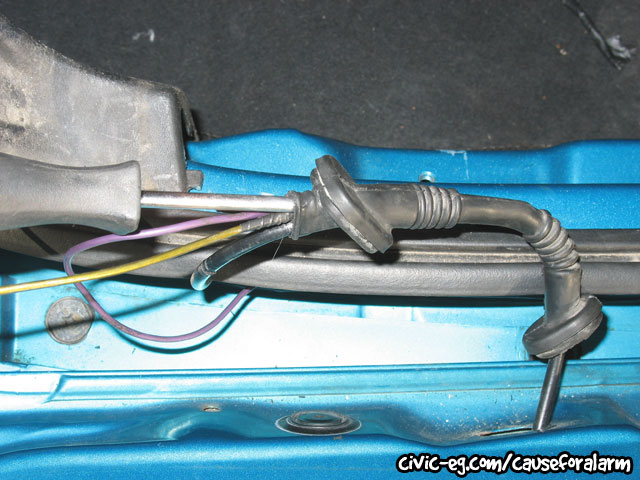
Here I show you how to use a coat hanger to insert the wires, but even this method is very difficult due to the bellowed shape of the rubber boot.
Statistics: Posted by suspendedHatch — Mon Feb 01, 2016 7:04 am
]]>
In the meantime, there was a 50% off day at the junkyards on New Years. I took this opportunity to blow some post Xmas cash on myself. I don't even have a car for this project and it could go one of two ways. First let me list what I got.
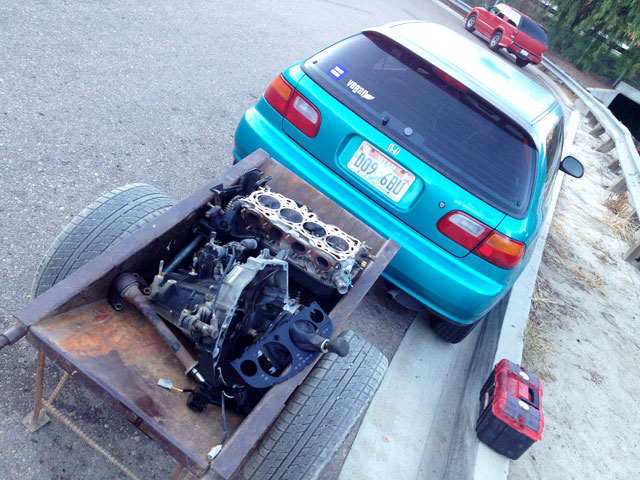
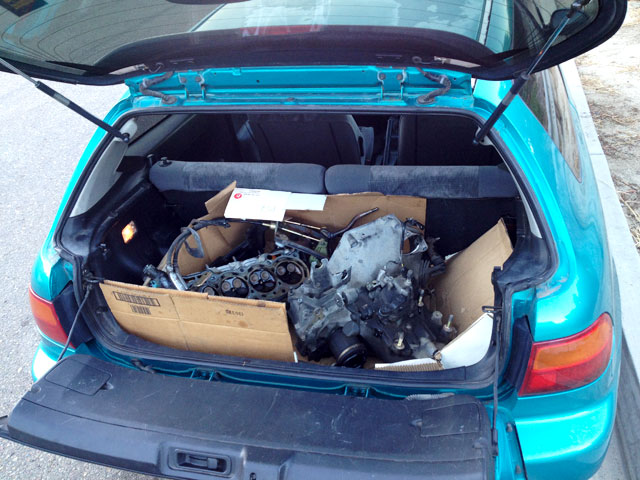
F22A1 Head
half shaft - CD Accord
Manual Trans - CD Accord Wagon (shortest OEM F Series gearing available)
Shift Cables, Shifter - CD Accord
Gauge Cluster Bezel - manual CD Accord
Additionally, I was also given a 94 Accord EX parts car for free. The engine was the only thing missing. I swapped the rear discs and front/rear swaybars onto my 94 Accord Sedan. Now I have two sets of shift consoles, two manual transmissions, mounts, all the pedals etc that I need to convert my sedan to manual. I could then head swap the F22B6 that's currently in my Accord (came off a 97 Odyssey after the original engine seized).
My original thinking was to get an EK and F swap it. I could use the F22B6 block with the F22A head. The block could use a rebuild anyway. Since it's from a 97 Odyssey, it could be BAR'd (as long as I conceal the head swap and any other aftermarket parts). Then I'd just need to get another engine for the Accord which I wouldn't mind rebuilding anyway.
The reason I want an EK is because it's the only chassis that has room under the hood for an F swap without needing spacers which is something I steadfastly refuse to do.
The truth is, I now have enough parts for both projects. Neither is on the calendar yet, but having all the parts handy is a big first step. You never know when an EK shell will pop up and be too good to pass up.
Statistics: Posted by suspendedHatch — Mon Feb 01, 2016 4:37 am
]]>
I just got back in town a couple weeks ago. I had been learning how to rebuild transmissions with my older brother who has been doing it since the late nineties. My son had been driving my cars, alternating between them to keep the batteries charged. The day I get back he notices a big puddle of coolant under the hatchback. I had replaced all the water hoses a couple months ago, so I was thinking it must be the water pump. Green drops coming out from behind the crank pulley confirmed it.
Water pumps are designed to weep coolant when the seal around the bearing fails. Coolant contaminating the bearing would destroy it. Engineers have decided it would be better to alert you by pissing coolant everywhere than to wait until the pump stops turning and snaps your timing belt.
Parts
If you're going to do this, get the timing belt kit. It's about the same price as a water pump and timing belt so the tensioner is free. If the tensioner bearing is still good and it's not time to do the timing belt, you can save money and just get the pump. It's up to you. The VX kit isn't common and has to be ordered. If your accessory belts are cracking, you should replace those too. You'll also need coolant. The spark plugs are coming out so you can do those now if they're about due.
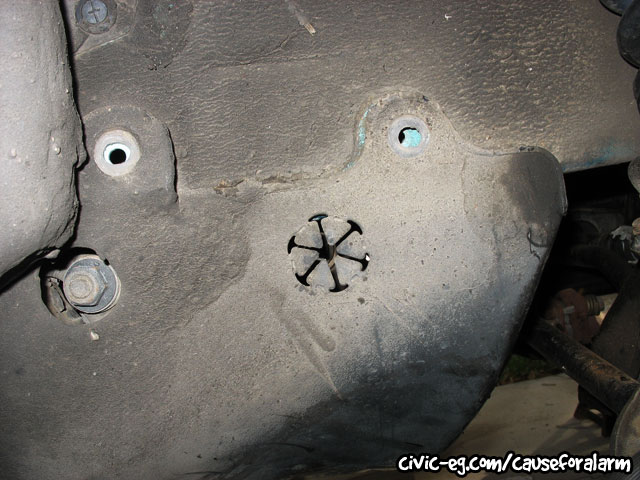
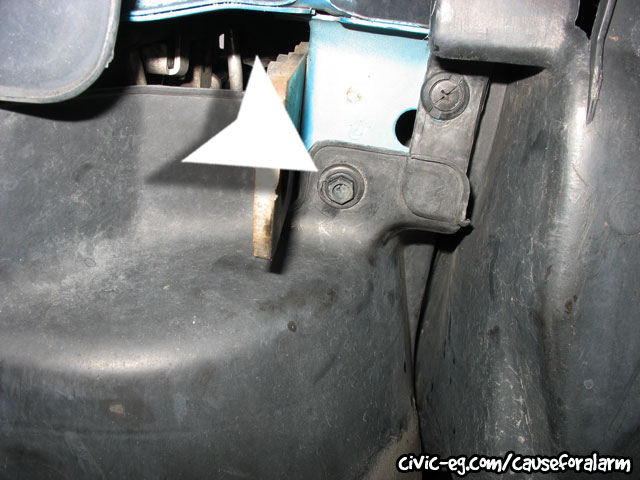
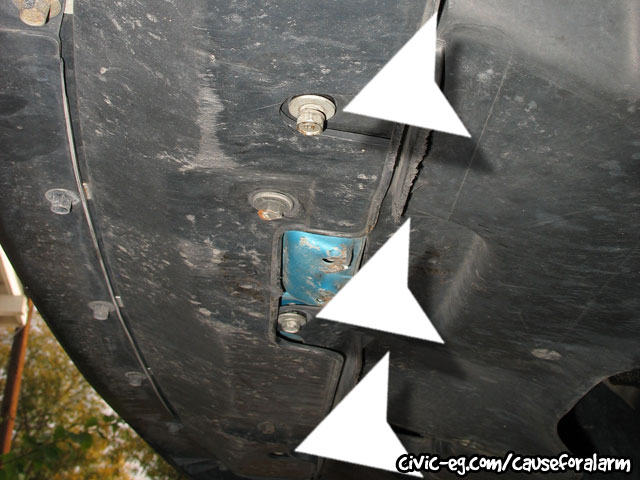
To get access to the crank pulley you have to remove the lower splash guard. I took it off halfway and let it hang, but I regret it because it kept getting in the way. Just take it all the way off. Set your heater temp to full hot and drain the coolant.
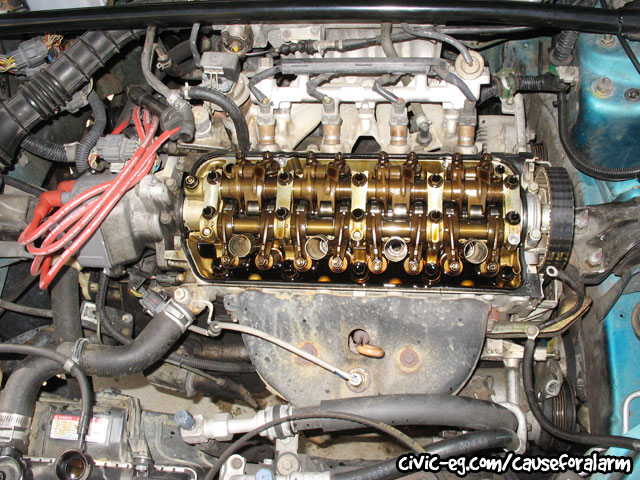
You have to take off the valve cover to get the upper timing belt cover off. The upper timing belt cover overlaps the lower. You should also remove the spark plugs because it makes it easier to rotate the engine by hand.
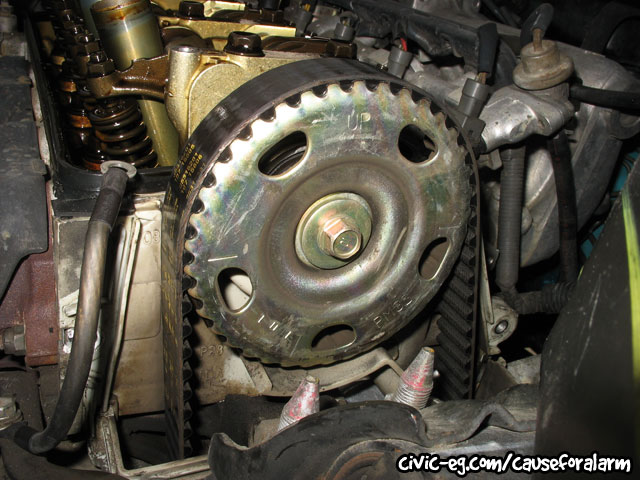
There are two 10mm bolts at each side of the upper timing belt cover. Once it's off, turn the crank pulley counterclockwise by the 17mm bolt until the pointer on the lower cover is at the white mark standing off from the three other marks. "UP" on the cam sprocket should be at the top of its rotation. If it's at the bottom, turn the crank pulley one more rotation.
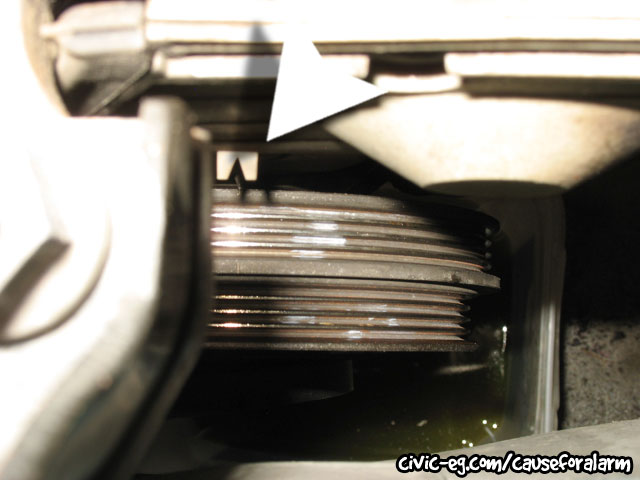
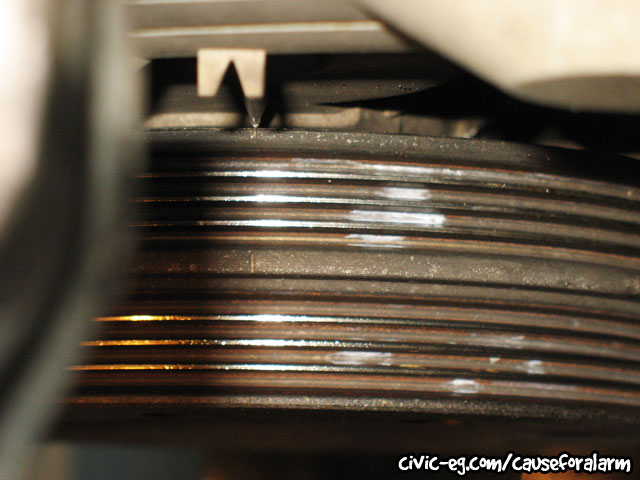
I took this pics at an angle so you can see the pointer, but it should be lined up when tdc'ing the engine.
The engine gets hard to turn as you're approaching tdc and then suddenly gets easier, causing you to overshoot the mark. If you overshoot it, you can't turn it clockwise back to the mark because you will tension the belt the wrong way and cause the timing to be off. You can turn it clockwise a quarter turn and try again.
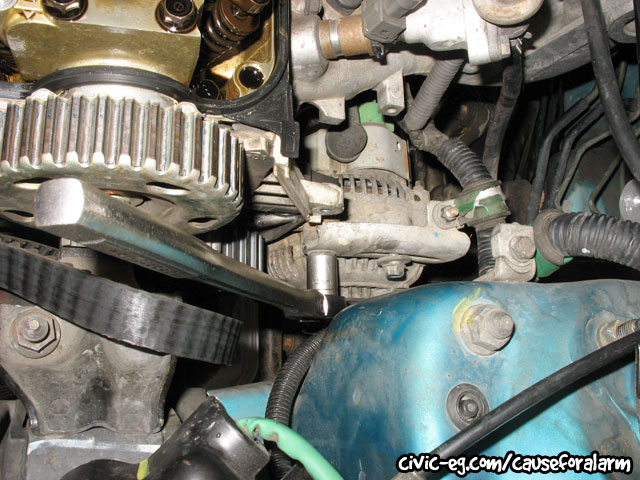
Now you have to get the accessory belts out of the way. My car has air conditioning and an alternator but no power steering. Disconnect the battery ground before messing with the alternator. There are three bolts on the alternator. You can loosen the lower one and leave it in but the upper two need to come all the way out because the bracket bolt holds the water pump down. To take the AC belt all the way off, you'd have to undo the engine mount. That's a big hassle, but there's no need. Just let it hang out of the way.
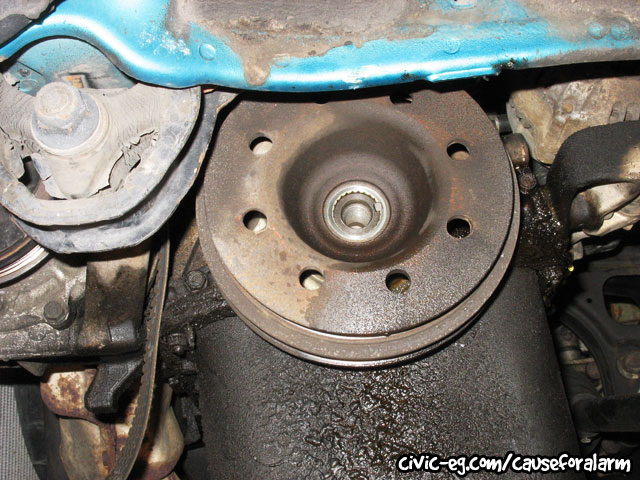
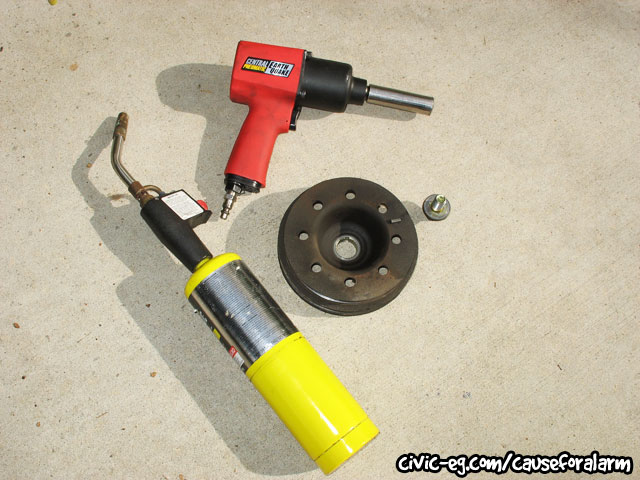
The VX crank pulley doesn't have the big hex section for a crank pulley tool. The bolt was stuck and I wasn't getting anywhere with the impact. I hosed the crank pulley bolt with PB Blaster, put the trans in gear, then propped a pole between the seat and the brake pedal to keep the brakes held down. That still didn't get it so I texted dem0nk1d and he dropped by with a care package: better impact and a torch.
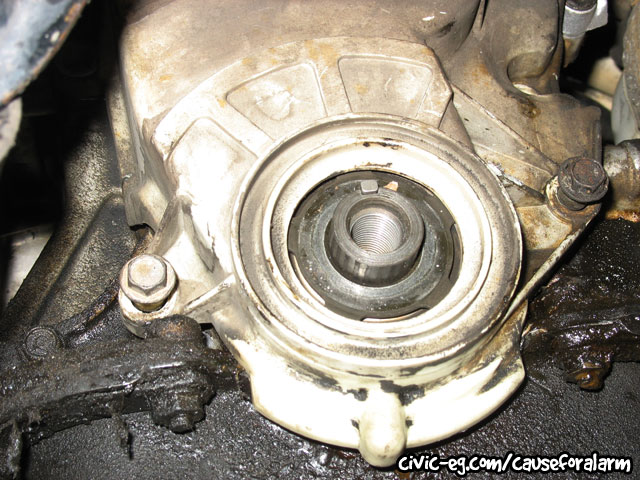
After several attempts, the crank pulley bolt started to turn slowly and then zipped off. Be careful not to lose the keyway when you pull the pulley off.
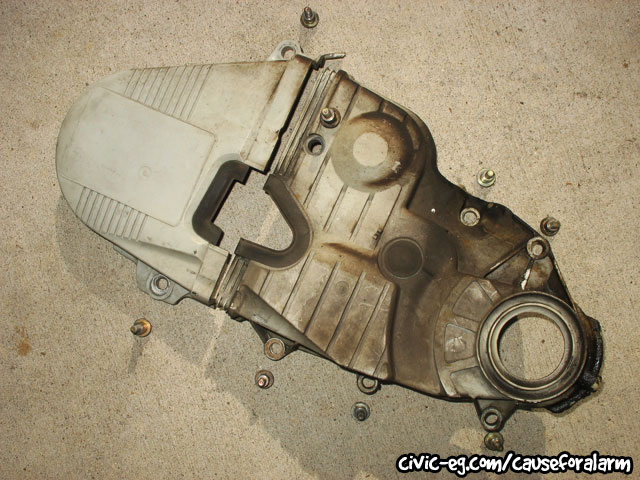
Now take off the lower cover. This pic shows you where all the bolts are.
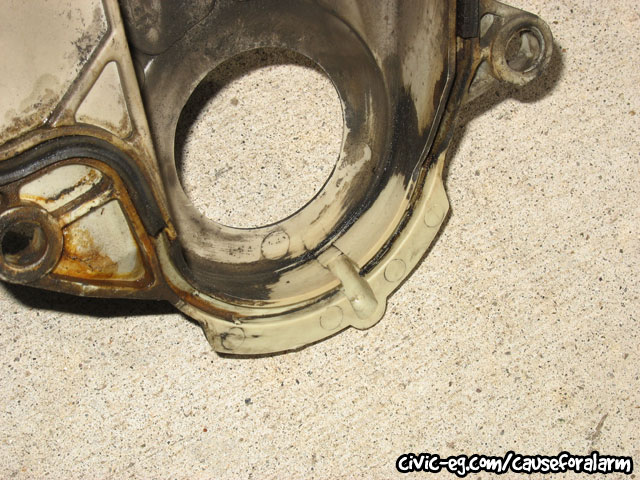
Clean out this drain section. I would have cleaned up the whole cover but I was rushing to get this finished and I plan to have this engine out soon anyway.
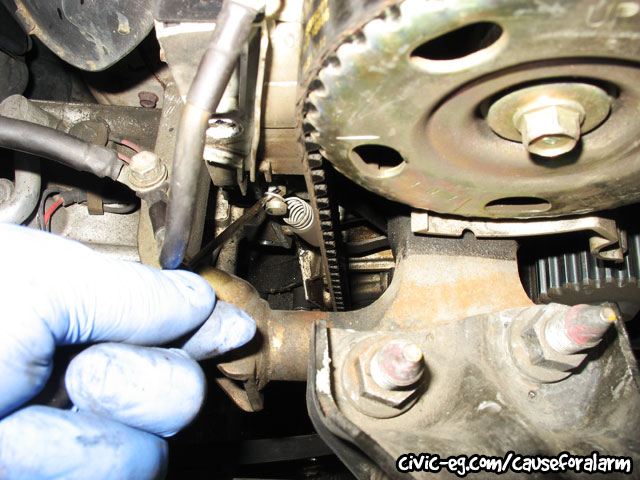
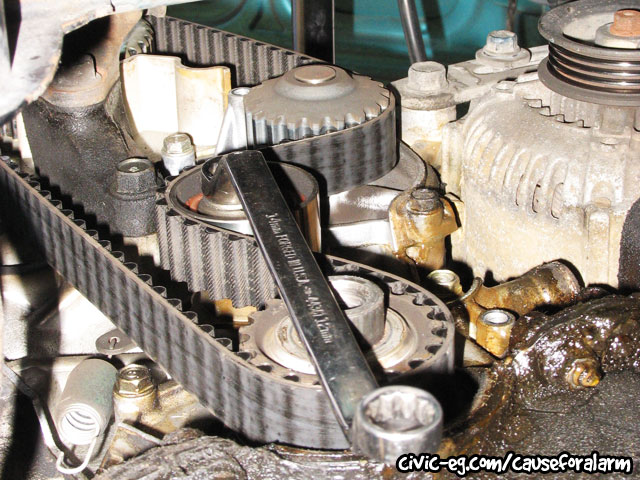
Unhook the tensioner spring and then break loose the adjustment bolt so you can remove the timing belt.
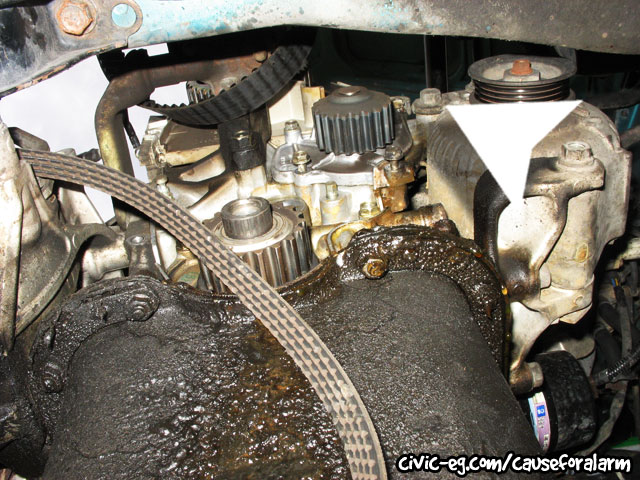
Besides the obvious 10mm bolts holding the water pump down, the alternator bracket bolt has to come out as well. Clean the surface off for the new pump. A scotch pad works best.
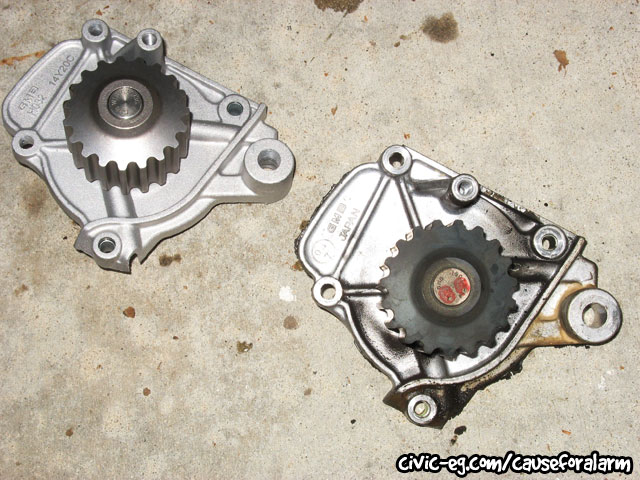
Compare the old pump to the new one. The VX pump is different than DX and EX/Si.
Now install the new pump, timing belt, and tensioner. Put the spring on and make sure the tensioner is on the little tab. Tighten the bolt finger tight and install the lower timing belt cover and crank pulley. Cover bolt torque spec is 7 ft/lbs and crank pulley bolt torque spec is 134 ft/lbs but most torque wrenches don't go that high. The belt guide goes on concave side facing out. Rotate the engine counterclockwise a couple times and recheck the timing. If it's off, mark it, slip it off the cam sprocket, turn the sprocket, then slip it back on and try it again. Torque the adjustment bolt to 33 ft/lbs (if you can get a torque wrench in there) and put the upper timing belt cover back on.
Clean the valve cover gasket mating surface and inspect the gasket. It should be flexible and not hard and cracked. Remove any old sealant and wipe oil off the gasket, careful that you don't stretch it out. Hondabond at the 90 degree bends is recommended but not always necessary. Make sure the spark plug tube seals slide around the tubes. Torque the valve cover bolts to 7 ft/lbs. These are prone to stripping and breaking because the torque spec is lower than anyone expects. Put the spark plug wires back in, put the breather hose back on and reconnect the valve cover ground.
Use a pry bar to hold tension on the alternator belt as you tighten the upper retaining bolt. This one is 17 ft/lbs while the bracket and lower bolt are 33. Don't forget to tighten the lower nut. Everyone forgets. Install and tension the AC and power steering belts if you have them.
Pour coolant into the radiator and start the engine. It should be idling normal unless your cam timing is off. Let it warm up to operating temperature with the cap off to burp the system. The radiator fan coming on is a good indicator, but mine doesn't get hot enough from idling so I just wait until the bubbles stop coming out.
Torque Specs
Water Pump 9ft/lbs
Alternator Bracket 33 ft/lbs
Statistics: Posted by suspendedHatch — Mon Dec 21, 2015 8:13 am
]]>
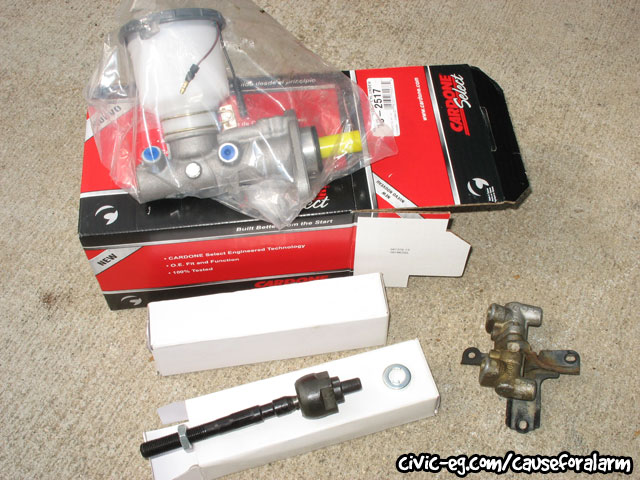
I found a 15/16 master cylinder complete with the bench bleed kit and reservoir for really cheap on eBay.
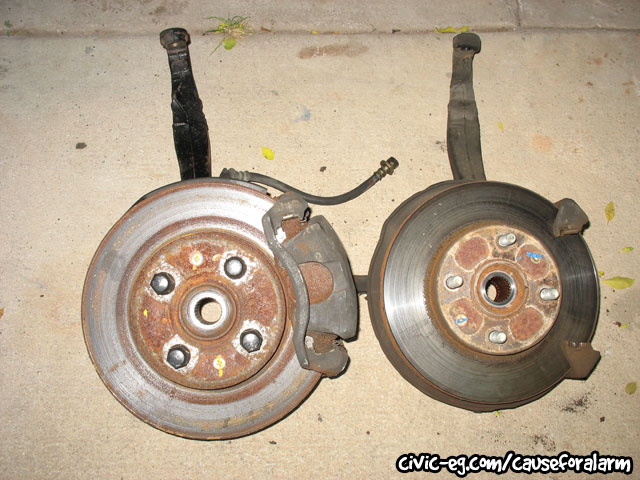
The size difference between my original brake rotors and the SiR is quite apparent.
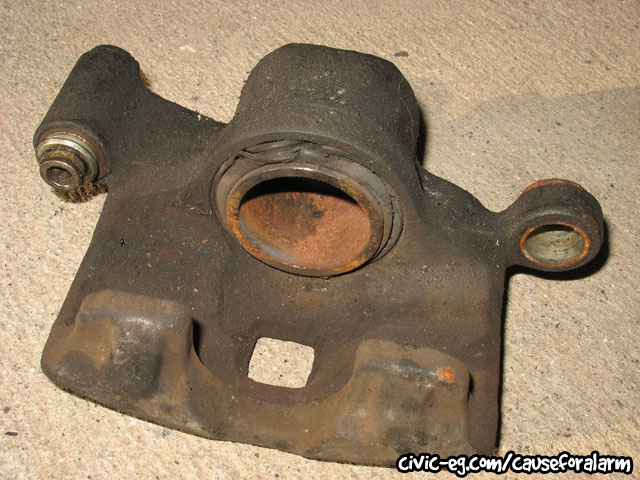
This is what hastened my plans on doing the brake swap. The seal was blown on the original 300k mile caliper and it dragged all the time making a lot of screeching sounds.
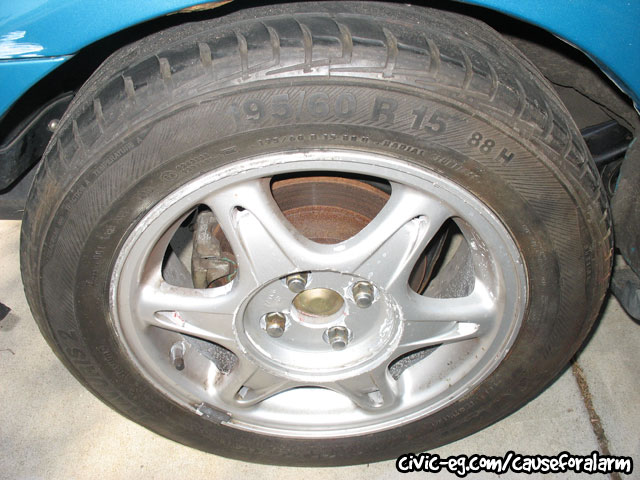
The 13in VX rims wont fit over the bigger front calipers, but I have these '96 Integra SE wheels that I got cheap a while back. The previous owner incompletely removed plasti dip from them and the caps are missing. The tires are too big and my car needs to be lowered, but they'll work for now.
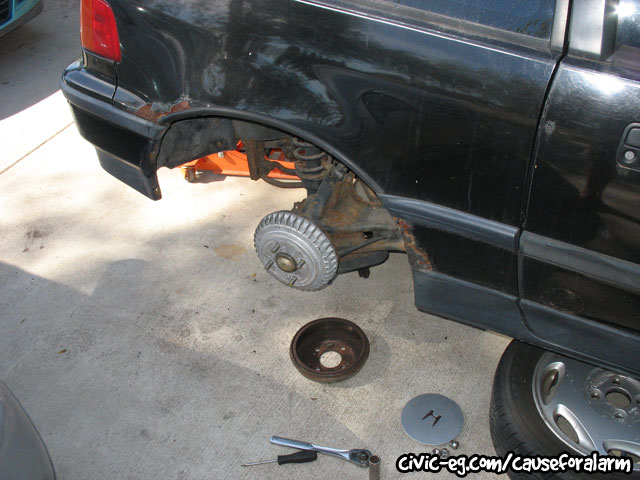
The aluminum Insight drums aren't being wasted of course. I put them on my CRX which I plan to keep with the stock brake setup. The VX rims may end up on the CRX as well, especially after I've swapped the VX engine into it. It's going to be my super high mpg build.
Statistics: Posted by suspendedHatch — Sun Dec 06, 2015 9:01 am
]]>
]]>
The symptoms I was having were that on the freeway I would hit a seam in the road and the car would veer to the side. Over bumps I would hear a sharp pop. I knew since I bought the car that the tie rod boots were ripped and that they were pretty dry. I planned to lower the car and swap the brakes- both of those things require an alignment, so I wanted to get it all done at once. I finally tackled this when I was doing my SiR brake swap.
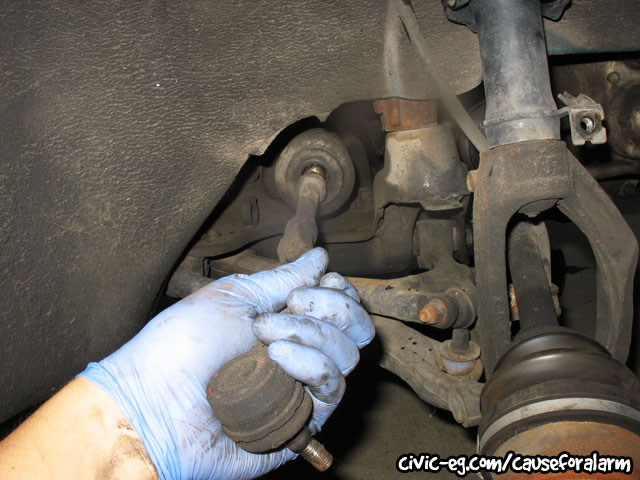
The way to check for a suspension problem is to jack the wheels off the ground, grasp each at 12 and 6, and give a jerk. There should be no play. If there is, see if the movement is in the upper or lower ball joints. Check the bushings in the control arms. Try to narrow it down. Grasp the wheel at 9 and 3 and do the same. You have to differentiate play with pulling the steering wheel. In my case, I could tell that it was coming from the passenger side steering but I couldn't tell if it was the rack, inner or outer. Disconnect the tie rod end from the knuckle and jerk on it to test the inner ball joint. There can be absolutely no play. This is where my problem was. My outers were still good so I reused them.
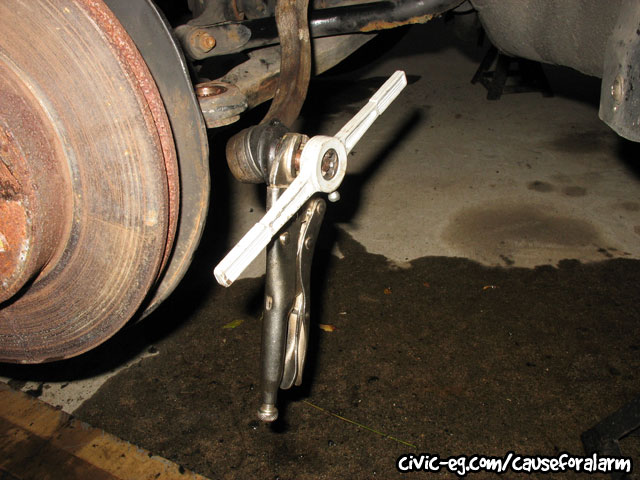
Chase the threads on all the ball joints so that the castle nut can spin on without turning the whole thing.
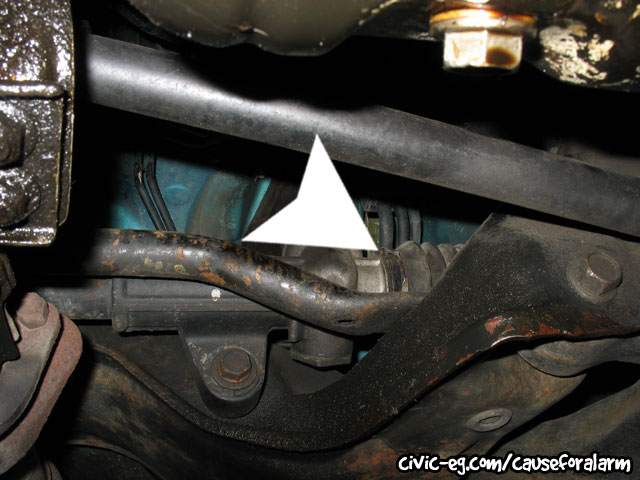
Use some cutters to cut the bands, then a razor blade to cut the old boot off.
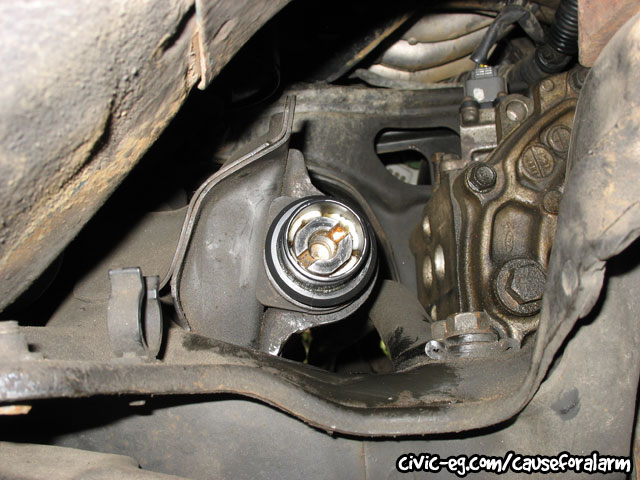
There's a white plastic bushing just inside the rack on the passenger side that's sometimes the cause of play in the steering.
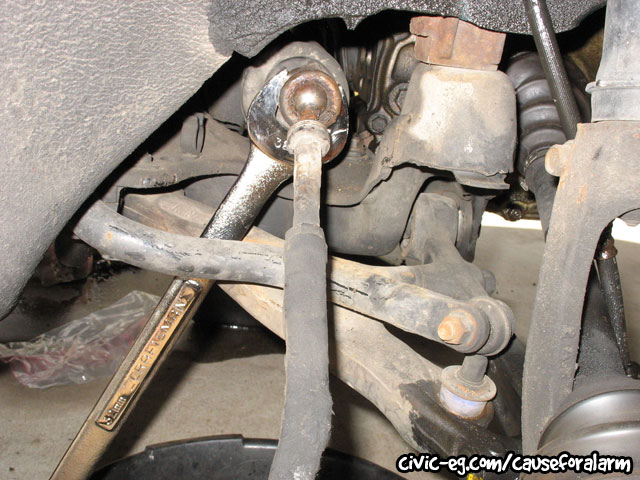
It takes a 32mm (1 1/4) wrench to remove/install the inner tie rods.
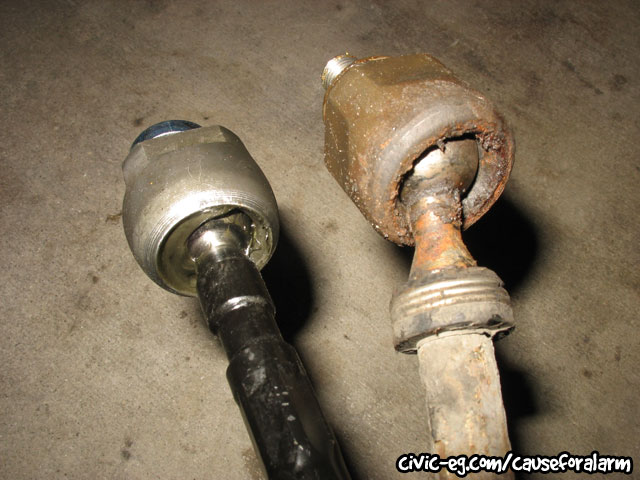
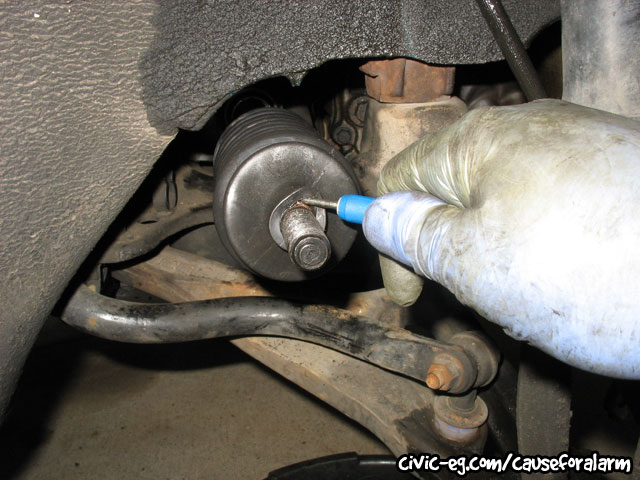
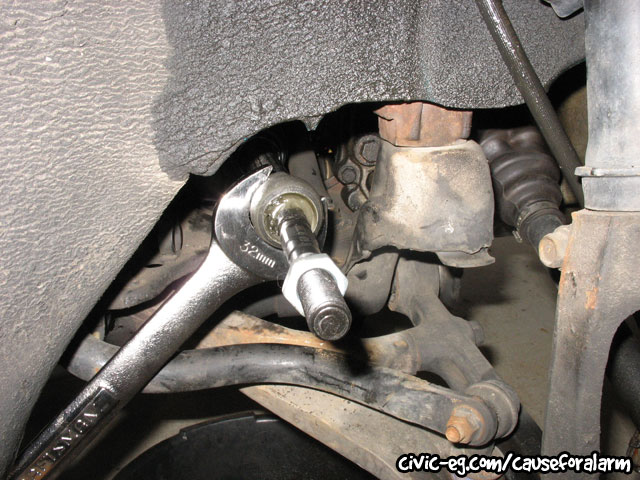
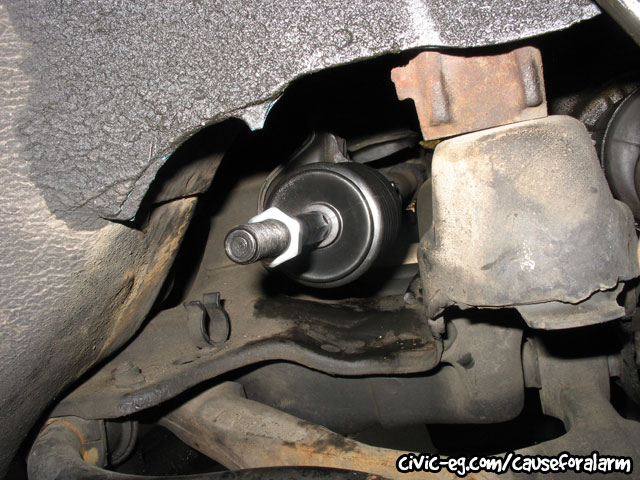
Match the length of the adjustment nut on the old tie rod to the new one as close as you can so that you can drive the car to the alignment shop and still have the steering wheel close enough to the center.
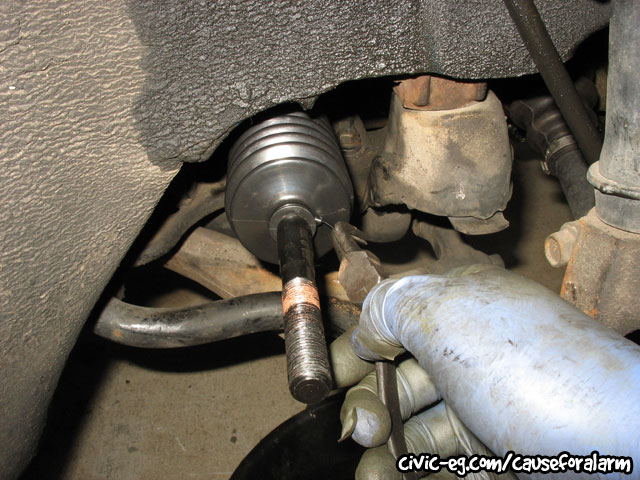
Put some grease on the new tie rod and slip the boot on, then put bands or zip ties at each end.
Statistics: Posted by suspendedHatch — Wed Dec 02, 2015 11:16 pm
]]>
]]>
]]>
]]>
]]>
D15Z1 170F Thermostat
The Civic VX uses a unique temperature thermostat to all other models of Civic. Honda didn't use it again until the 2005 Civic Hybrid. It's 170F vs the normal 180. Parts stores don't recognize this and will often incorrectly supply you a 180 degree thermostat which affects your car's ability to achieve its full fuel economy potential. If you have a VX, you should check and try to see if you can tell if it has the correct thermostat. They're cheap enough that you might decide to simply replace it. You may have to special order it because it's not common. Try to find out if it comes with a new gasket or you have to buy one separately.
Don't try changing the thermostat temp like you might on a domestic. Honda designed these engines to run right around 212F (oil and coolant) to vaporize the fuel and get the most energy out of it. You wont find any gains here and this is not the way to try and solve a cooling problem. Flush the system, check your cooling fan switch (the sensor on the thermostat housing), fan, and fan relay. Mix the coolant properly. Check the weep holes on the water pump.
In my case, my car was taking forever to warm up and never warming up in the winter. I took the old one and boiled it in water, took it out, and discovered that it never closed all the way.
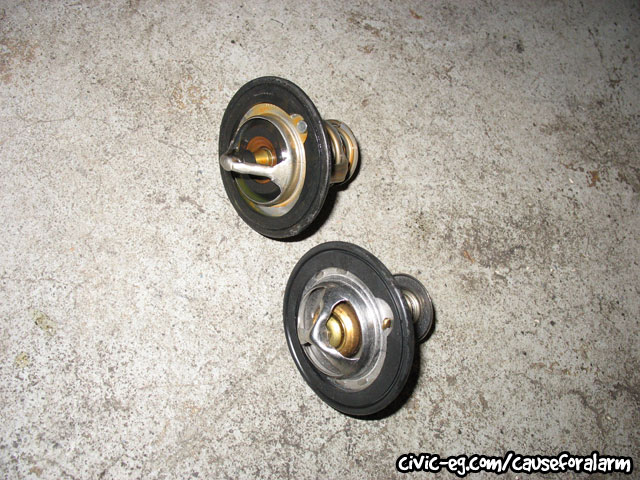
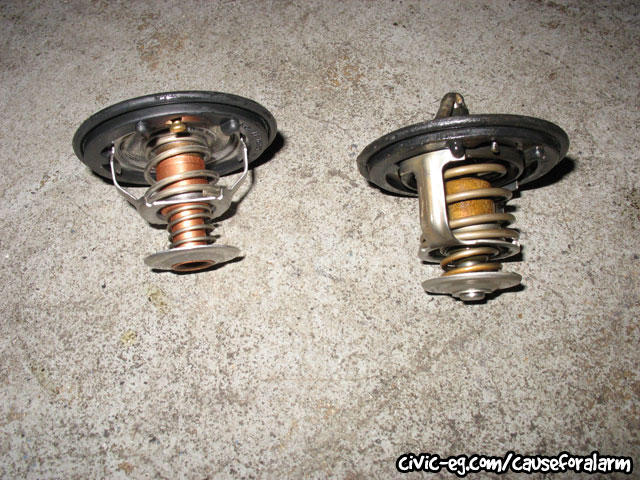
Comparing the 170 and 180 thermostats.
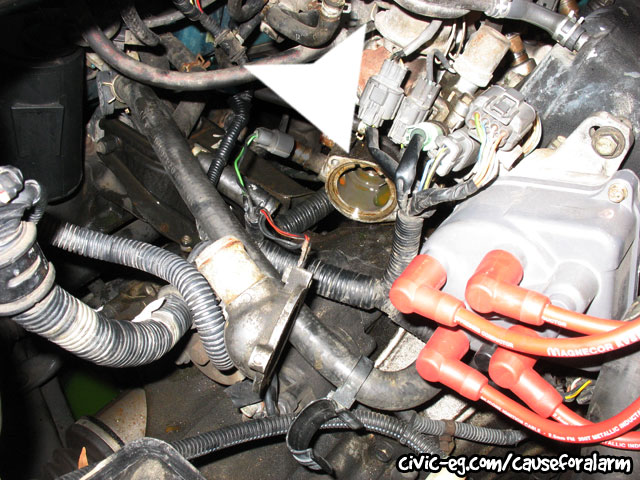
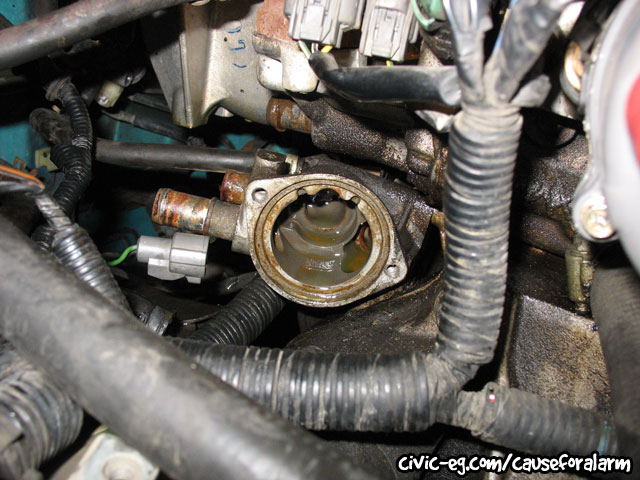
The ground on the thermostat housing is critical. This is a good time to check it out and see if the ring terminal or wires are corroded. Don't be tempted to try to upgrade this ground by adding a wire. This is the ECU's sensor reference ground so it can calibrate all the sensor readings.
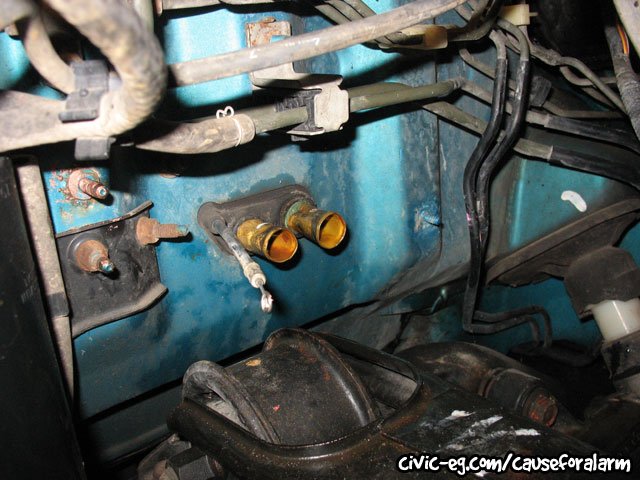
Coolant Flush
When you change a thermostat, you should flush the coolant system in three places: 1) through the top of the radiator, 2) into the thermostat housing and out the water neck that feeds the upper radiator hose, 3) both directions through the heater core. This last one is especially critical as a normal flush wont get the gunk out of the heater core like going directly to these lines will. Make sure the heat selector is on full heat.
These lines are delicate and often crushed. Probably from squeezing with pliers to pull the heater hoses off or from getting pinched during engine removal. Put a socket inside and tap it gently to pound them back out.
Statistics: Posted by suspendedHatch — Tue Dec 01, 2015 8:29 am
]]>
Car Audio Setup
My years as a car audio installer strongly influence and inform my taste in sound quality. I've never been a fan of putting very high end products in an environment which is inherently bad for sound quality. I prefer to buy good quality products and get the absolute best performance out of them, with a strong leaning toward saving weight and not putting holes in the chassis and interior plastic.
Rewire Stereo
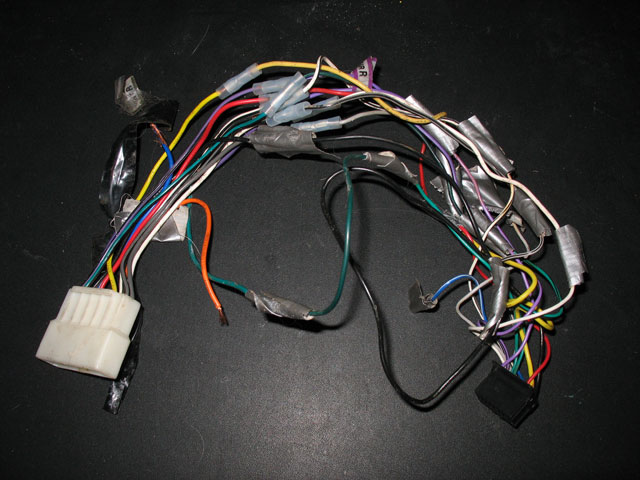
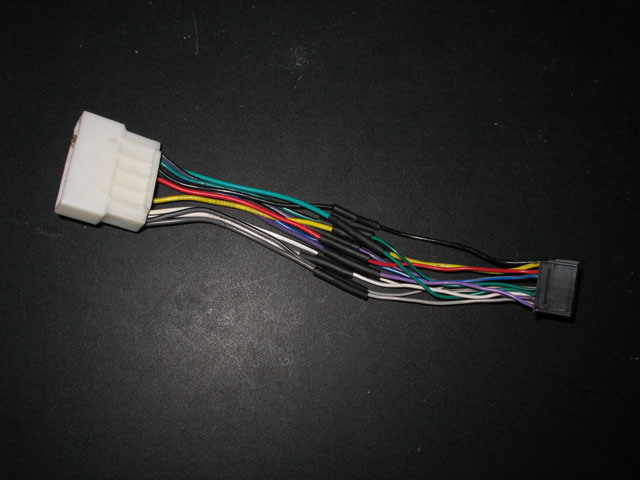
Whenever I take on a project car that already has an aftermarket stereo, I always pull the stereo and look at the harness. A lot of times it will look like the disaster above. Fifteen minutes to clean it up is probably the biggest investment/benefit time ratio you could spend on a car, short of vacuuming and washing it.
With any car that I plan on having for a long period of time, I run new heavy gauge power and ground wires directly to the battery, and then I run new heavy gauge speaker wire into the front doors*. I remove the rear speakers to decrease weight, save cost, free up wattage for the front speakers, and to improve staging.
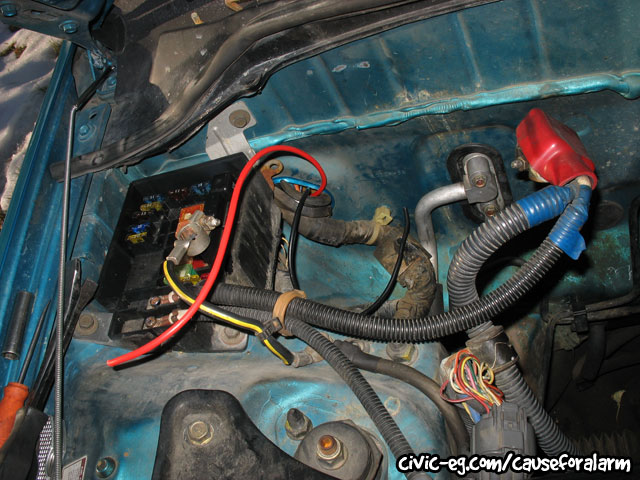
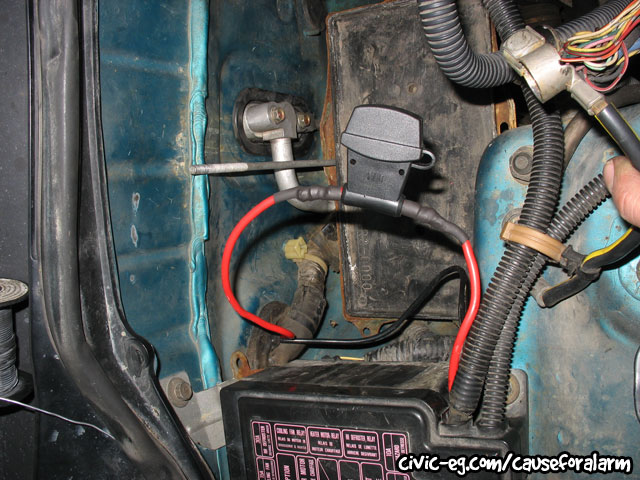
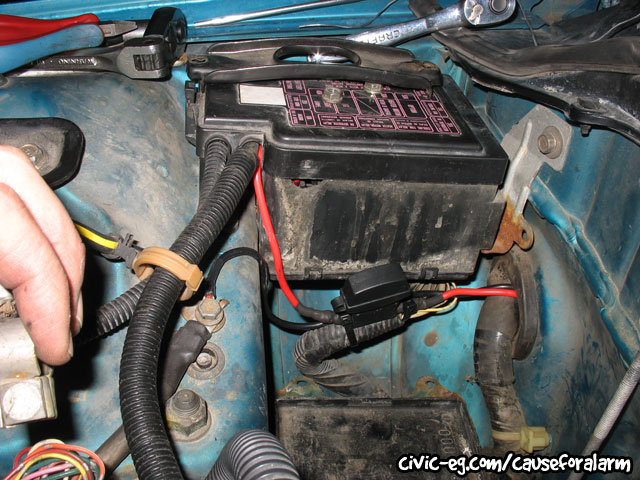
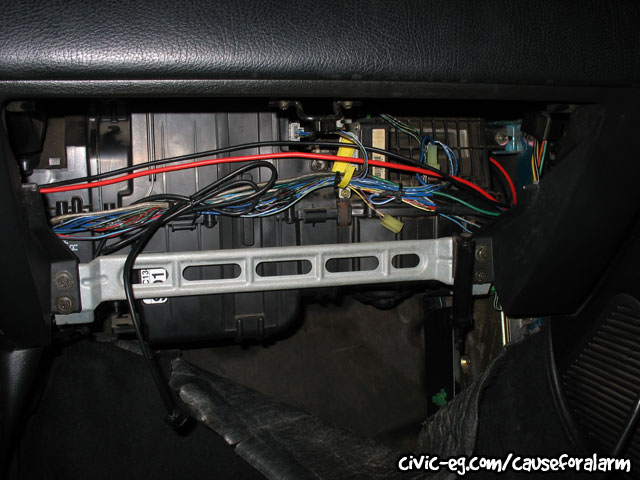
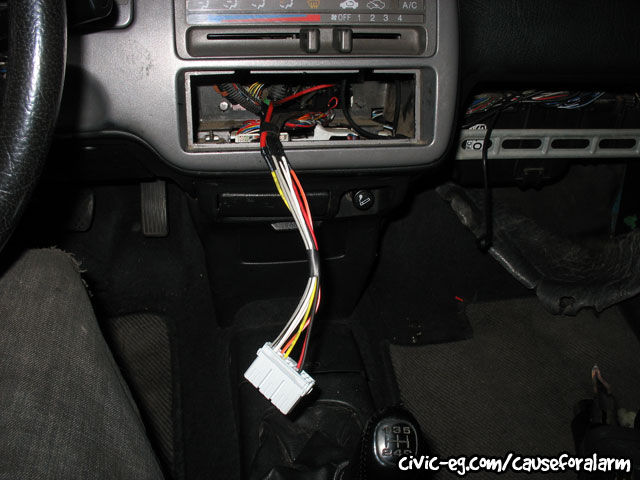
The only factory wire left over would be the accessory power wire, which I run straight to the under dash fuse box to avoid needing the stock stereo harness at all.
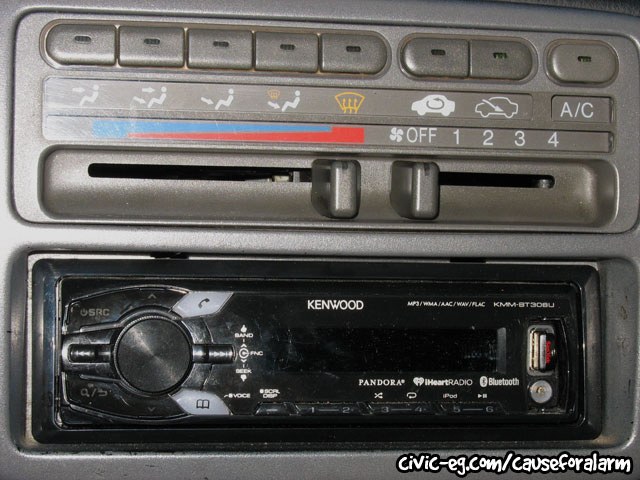
Stereo Choice
Most new stereos today put out as much power as the high end stereos of a decade ago, but I still look over the specs when making a decision. For the longest time I was a loyal customer of Alpine stereos, but their quality took a slide while Pioneer took a step forward. Most recently I've given up on CD players altogether. Keeping CDs in a car is a disaster. They're clumsy to handle, they get messed up easily, you have to change them frequently, they skip, they entice thieves, and who the hell still buys CDs anyway??
Manufacturers have started offering digital media players that lack cd drives altogether. I had hoped they would use the freed up space to increase the size of the internal amp, but so far they've chosen to reduce the price instead. They sell digital media players as a low cost alternative, and so the faceplate and trim ring look like those you'd find on the bottom of the line. The overall quality of the Pioneer is good, but I found a problem that could not be resolved through their tech support and is an apparent problem with the OS across their entire 2014 line, so I switched to a Kenwood. The look and usability of the Kenwood is not as good as the Pioneer, but the sound quality is comparable and it recognizes all the music on a 64 gig thumb drive, while the Pioneer does not (only recognizes the first 4 gigs). I'm hoping that Pioneer will correct this issue in their next lineup.
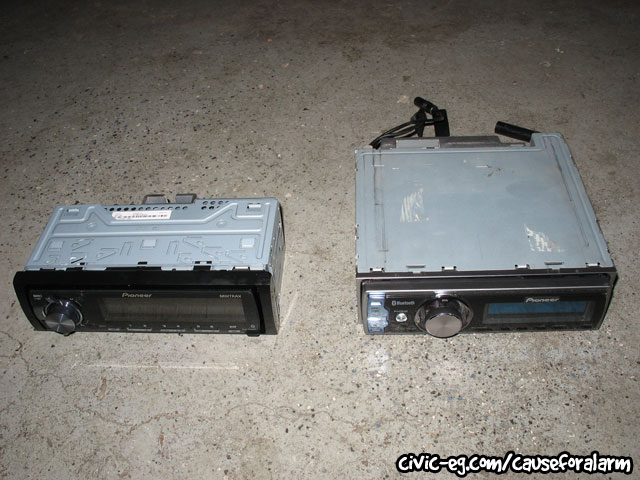
The smaller depth of a digital media player is very welcome on the EG chassis which is notorious for being an extremely tight fit for stereo wiring. The lack of a CD drive saves over a pound and a half. The stereo on the right is one I've had in seven vehicles. It still works great but lacked modern technological advances like USB.
Speaker Choice
Unlike stereo brands, there are a lot of good brand speaker options. Pioneer is the clear choice in stereo brands as of 2015, but I don't recommend their speakers at all. Sound and build quality are lacking, as is the case with Sony. Alpine, Polk, Infinity, and Kenwood are all great options. Listen to them on the displays or preferably in a friend's car, compare the specs, prices, and make your choice.
My personal favorite are Kicker components. They are a cut above the brands I mentioned, but they have models at a price point between the average brands and the really high end brands like Focal etc. My car already has Infinity Kappas in it, which are great sounding speakers, so replacing them with Kicker components is not a priority. I'd rather spend that money on sound deadening which is a topic I hope to cover later.
4 Channel Amplifier Or Not
When choosing speakers, you need to decide whether you plan on amplifying them or not. If you have money, don't race, and plan on adding a subwoofer, you're going to want to amplify your front speakers. If you take my advice and only run front speakers, you can combine two amps in one and choose just a single four channel amp. The amp needs to have high and low pass filters. Your stereo should have a subwoofer RCA output so you can have some controls through your stereo.
Use the high pass filter on the front, somewhere around the 100 range. The lower the number, the more bass your front speakers will play, which is bad. That draws power away from their ability to play mids and highs, which is what they're best at. Use the low pass filter on your sub, again around the 100 range to prevent it from trying to play highs and too much midrange. Amp tuning is best left to someone with experience but it's good to know where to expect the knobs to be.
Basic is Best
The best bang for your buck, lightweight system wont have a subwoofer or amps. You'll never have real bass, but you can have good sound quality for driving to work and back each day. You wont have a lot of equipment to lose in theft or in an accident. Choose a stereo with a high rms output (ignore outrageous watt claims) and speakers with a high sensitivity rating. Every dB counts. Choose speakers that most closely match their max rms power handling with the stereo's rms output. If you're amplifying the system, sensitivity is much less important. Don't match speakers with very high power handling to a stock stereo. Lower will sound much better. Nothing worse than underpowered speakers, and cranking them up will blow them more easily than you can blow overpowered speakers.
Component Speakers
The differences between regular speakers and component speakers are that the tweeter is separated from the mid range mounted separately and passive crossovers are provided to optimally divide the frequencies between them. They'll give you better sound quality but are more expensive and more difficult to install. If you go this route, I suggest swapping EX coupe or Si door panels into your hatch and mounting the component tweeters over the stock tweeter locations. Also, if you're at this level, at the very least you should sound deaden your doors because it will make as big a difference in sound as going from cheap speakers to good ones. Speaker cones need to vibrate to produce sound but they lose that ability if the surface they're mounted on vibrates in opposition.
My Plans
I plan on someday sound deadening the whole car with a kit from , putting the Kappas in my CRX and getting Kicker components for the EG. I'll have custom fiberglass boxes made for some small kicker subs in each of the OEM rear speaker locations, and finding somewhere to hide a four channel amp. In the meantime I'm enjoying my budget setup and occasionally getting compliments on the sound quality.
Statistics: Posted by suspendedHatch — Tue Dec 01, 2015 7:05 am
]]>
]]>
]]>